


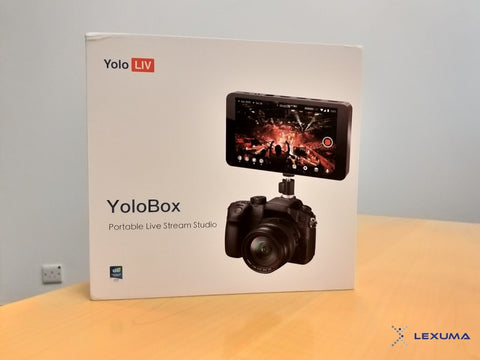
How to make your live streaming interesting with YoloBox?
Without YoloLiv YoloBox, you most likely need to prepare various hardware and download the software for live streaming. If you are new to live video, you may need time for learning how to set up all the equipment and learn how to use the live streaming software. The good news is YoloLiv YoloBox can solve all the complication for you. You can simply use YoloBox for live streaming under an easy setup. We will walk you through the initial setup in detail.
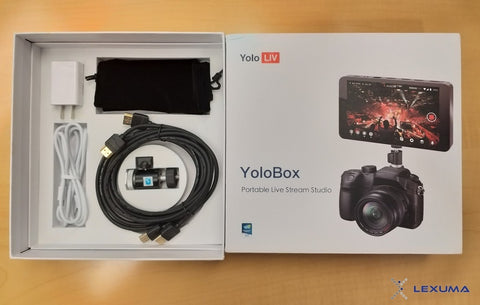
When you open the box, you will see the 7-inch touch screen, which is the YoloBox. Take out the screen and the upper compartment, you will see all the necessary cables and accessories inside.

The package consists of a power adapter and a Type-C USB charging cable for power supply. Besides, there are two Type-A HDMI cables for video sources and a Hot Shoe Mount for mounting the YoloBox on top of the camera. In addition, there is a storage bag for you to store your YoloBox properly.
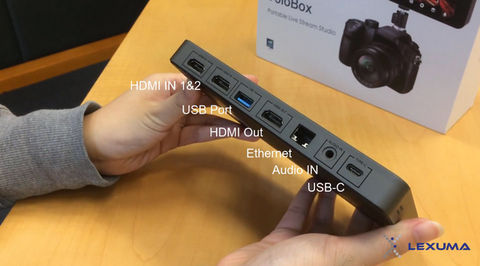
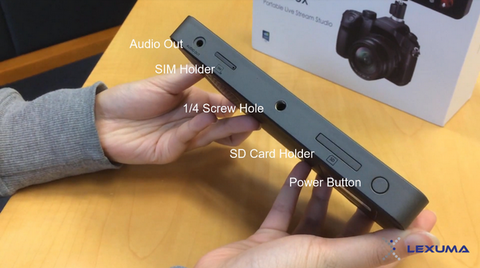
When we look at the bottom part of YoloBox, you will see all the connection ports there. For YoloLiv YoloBox, you can insert at most five video sources.
How to set up your YoloLiv account?
Before you go live with YoloBox, you need to register for a YoloLiv account first. The Yololiv account is for uploading the live video to the Cloud storage and sync the video to your live streaming platforms. Therefore, it is necessary to sign in for an account. When you press the power button and turn on the YoloBox, you will see the following on your YoloBox:
After a few seconds, you will be asked to choose one Internet access method. You can choose to connect with WiFi, 4G network or Ethernet.

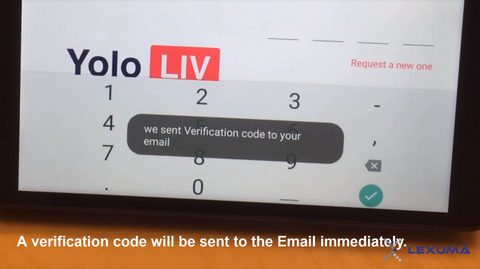
When you have connected with the Internet, you will see the following picture which requires you to enter your email address. That is the account registration process.

After you enter your email address, a verification code will send to your email.
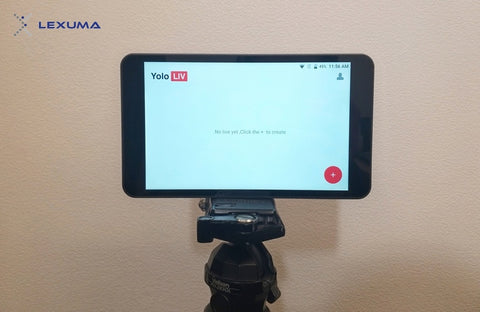
Enter the verification code and go to the password settings. Then, you will see the main page of YoloBox and the setup is done! It is easy to set up, right?
Let's browser the setting page of YoloLiv YoloBox.
In the setting page, you can see the connection status of each account (Facebook / YouTube / Twitter / Twitch) for live streaming. Also, you can make changes to various setups such as language, Switch settings, network settings, etc. Also, you can review your recorded video on the setting page.
The above is the overview of YoloLiv YoloBox. It is easy to set up the YoloBox for the first time. Get one now for your live video! <Click Here>